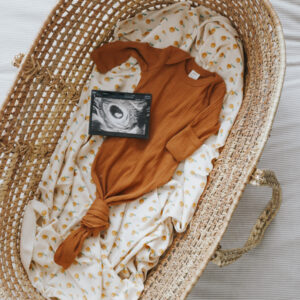
As soon as I got pregnant I was SO excited to decorate a nursery. I’m not due for many more months, but for a variety of reasons we decided to start this earlier!
I thought I’d share my boho Ikea nursery inspiration, as well as an update on our nursery progress! We won’t be finishing the room, or even purchasing furniture (crib, glider, etc) until closer to baby’s due date.
INSPIRATION
We aren’t finding out the gender of our baby, and wanted to keep things very neutral!
Ikea has so many cute boho + neutral items that set the stage for this room.
This room is also a guest room and since all of our family lives out of province we need to keep the guest bed! We expect to have our immediate family visit shortly after the birth, so this room will still operate as a guest room!
I had so many ideas from Pinterest that I LOVED, but was having a hard time combining them.
This is when I decided to make a vision board. I did this on canva – it was very simple!

KEEP THINGS MINIMAL
One of my main goals with this baby, and as we enter this new chapter of parenthood is to keep things simple & minimal. If you’ve been around a while, you know that while I love simplicity I still love colour and I appreciate beautiful, meaningful things!
Sure, I could have left the room white, added a crib and called it a day. But I wanted this room to be a space that we love, which is exactly what it’s become!
CHOOSE A COLOUR
I knew right from the beginning that I wanted to incorporate green into this room. We recently did a board & batten wall in our bedroom and I had half a can of paint leftover, so I thought I’d try lightening it for the nursery instead of buying another colour.
I used Benjamin Moore “Backwoods” and mixed it with white paint at a 5:2 ratio. You can ask for this at the paint store! The colour turned out EXACTLY as I wanted and I don’t think it could have been better even if I had purchased a new colour.
I’m hoping to eventually add a wallpaper in the closet as well 🙂

TEXTURE
I also knew right from the beginning that I wanted texture on the walls. A lot of popular nurseries on Pinterest have one bold feature wall. Because of the layout of this room and the guest bed, one feature wall just didn’t feel right.
I knew I wanted to carry out the texture & colour on all the walls.
We opted for beadboard wallpaper which was significantly cheaper than installing real beadboard (Cost was about $120). We purchased ours at Home Depot, but the same product isn’t listed on their website. This is similar to what we used, however ours was NOT prepasted which means we had to buy a wallpaper glue ($10).
I won’t say this process was super easy, but it was very forgiving.
Once the wallpaper was installed we let it dry for 24 hours before painting. I did two coats of paint the next day.
We then finished it off with 4″ trim pieces – the same as we used for baseboards. This isn’t really optional as the wallpaper didn’t have a nice edge on the top.
LIGHTING
We were super overdue to replace the ugly “boob lights” in all of our bedrooms. After looking at different options for years, I finally landed on these simple + inexpensive light fixtures for all three of our bedrooms.
I wasn’t interested in a hanging statement light in the bedrooms since they are little rooms and we are both tall!
My husband (not an electrician) installed the lights himself, so it was relatively easy!

PS – I didn’t intend to photograph this room with my dog in it, but he thinks this is his new bed now!
FURNITURE
The bassinet was a Facebook Marketplace find, but here’s a similar one! We plan to have the bassinet next to our bed in the Master Bedroom when baby is a newborn.
For a crib I plan on purchasing the Ikea SNIGLAR crib. I love that it is simple and timeless, but it’s also made of untreated woods making it a non-toxic option (yay!).

STORAGE
Storage was one of THE MOST important things to me in this space, and honestly in any space!
This room is TINY, especially with the double bed still in it. I’d like to avoid the need for a dresser and/or change table. We decided custom built-ins in the closet were the perfect solution.
We plan on keeping this closet open – no doors or anything. So it was important to make the storage practical but also pretty!
My husband made the built-ins with just a few pieces of MDF and 2×1’s for support. I painted everything white at the end to make it cohesive.

STORAGE BASKETS
I ALWAYS recommend choosing your storage baskets before choosing the dimensions of a space like this. I’ve learned this the hard way in the past and had a hard time finding baskets to fit a space.
I chose these baskets from Canadian Tire. Here’s a similar option if you’re not in Canada!
The remaining cubbies are 13×13″ which means they’ll fit most of the IKEA baskets from IKEA, so we’ll have lots of options! (Like this, this, and this)
IKEA NURSERY FAVOURITES
Since our nursery isn’t complete yet, I thought I’d share some other items I have my eye on! Or products that I love but decided against using in this space.
STATEMENT LIGHT: This is such a fun light, I just felt it was too big for this specific space!
TURTLE BEDDING: This bedding is so cute, and I love the colours! I think we’ll opt for something more neutral, but this would be a cute back-up set.
WICKER BASKET: Such a beautiful wicker storage basket.
ROLLING CART: I will for sure be purchasing one of these to use for diapers, wipes, lotions + creams, etc. Since we have limited storage, this will be the perfect portable option!
JUTE RUG: Such a fun and inexpensive rug!
SNIGLAR CRIB: This is the crib we will be purchasing. I honestly don’t think there’s a better one on the market.
WHITE BASKET: I love the vintage vibe these baskets have and think they would be so practical for storing all the little baby things.
CANVAS BASKET: These canvas baskets are a beautiful, natural linen colour. They would be perfect for storage in the closet.

I hope you enjoyed this post. Be sure to check back in a few months for my official, final nursery update!